Difficulty: easy to medium
(for windows users, substitute the Command key with the Control key, the Option key is the ALT key)
Ok lets start off with an image of a coffee mug. Open it in photoshop.
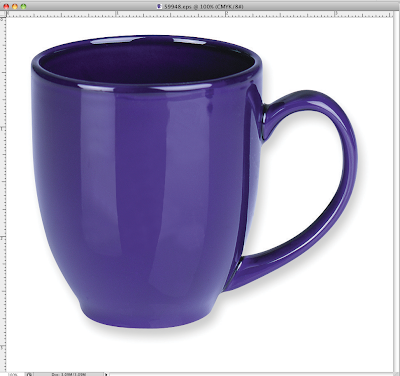
For this example we are going to use only text for the imprint. As I have said, you can use an image or text for this technique.
Press "t" on your keyboard or go into the tool box and select the horizontal type tool. By default photoshop shows this as a first option when you install photoshop. There's also the vertical type tool etc. These other options can be accessed by pressing and holding the tool with your mouse.
When the cursor changes into a typing cursor, type whatever imprint you want to put into the image.
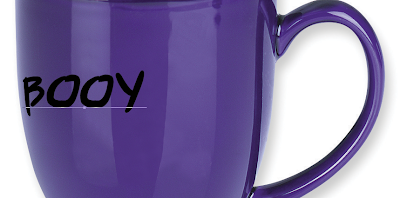
For this exercise I am going to type BOOYAH!!!
After typing the text, click on another tool or press the "enter" key in your numeric keypad to exit out of the typing tool and finalize your type.

Next, go to your layers palette and then right click on the text layer that you just created. A menu will pop up and you will select "rasterize type". Unrasterized type cannot be edited using the warp transform feature so you'd have to rasterize the type first. Rasterizing the type means that the type will now be converted as an uneditable graphic. Uneditable meaning you are not going to be able to edit the type on it anymore, but it becomes a graphic instead so you can do transformations on it.
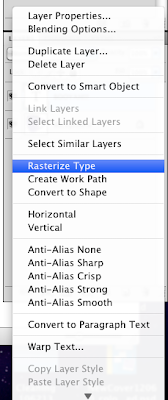
Now your type is ready to be transformed anyway you like it. For this exercise, we are going to use one of the most useful features in Photoshop called "warp". Make sure you have your type layer selected then go to Edit> Transform> Warp.
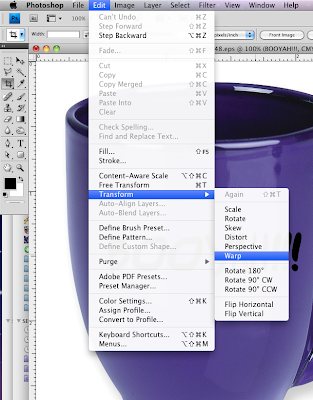
When you click on warp, the type layer that you just created will now show transform handles. These handles enable you to warp or deform the layer that is selected to however you want. You can warp the image by dragging a control point or by dragging a segment of the selected layer.
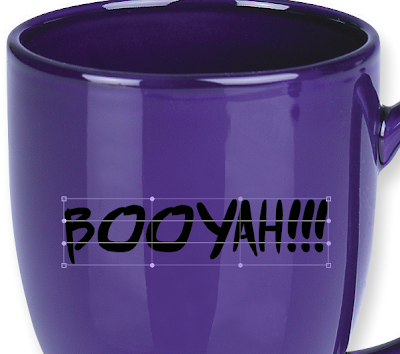
For this exercise I will just drag the 3 middle segments of the type layer downwards a bit to conform to the contour of the mug. After dragging them down, the type layer looks like this, with the transform guides showing what I have just transformed.
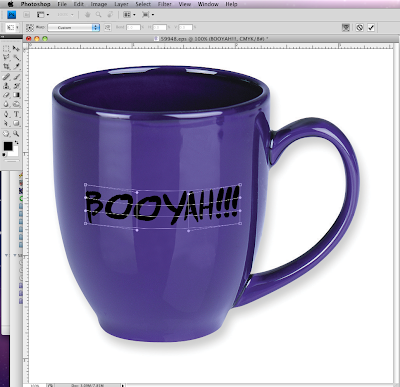
I press enter to finalize the transformation I just did. Then the control handles go away.
The type now looks imprinted on the cup because it's now contoured to the curve of the cup but it's not quite done yet. The part of the cup where the imprint is has a highlight on it. Naturally the type should have highlights too to make it look more natural. To do this, I selected the highlights in the cup that touches the imprint. You can select it by using the lasso tool (l) or the Pen tool (p) then making a selection from the paths.
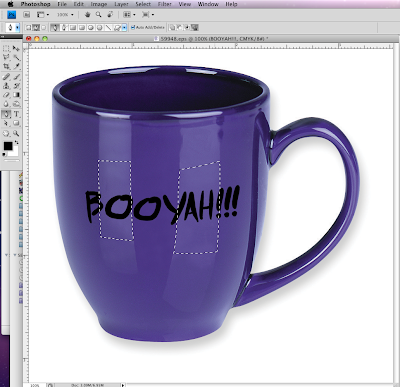
With the selection on, I go to my layers palette and click on the create a new layer button at the bottom right of the palette. It's next to the delete layer button. We are now going to create a highlight using a layer on top of the imprint layer. This enables us to make adjustments to the highlight without affecting the other layers. I then press "i" or select the eyedropper tool from the tool box. I then select an area of the highlight in the cup near the imprint area...this changes my foreground color swatch to that of the highlight color of the mug. I now press Option+delete on my keyboard or ALT+backspace for windows to fill up the selection on the current layer. The Option+delete shortcut is the fill with foreground command for the keyboard...you can always go to Edit>Fill menu on the top. This then fills up my selection with the highlight color that we just selected.
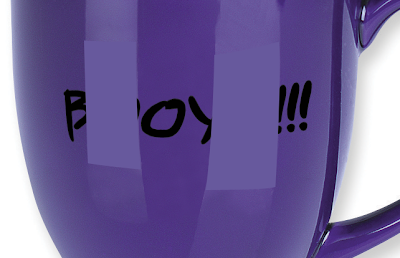
After filling the selected area with color, go to the layers palette then while holding the command key, hover on the type or imprint layer then click. This will give us a selection just for the imprint layer.
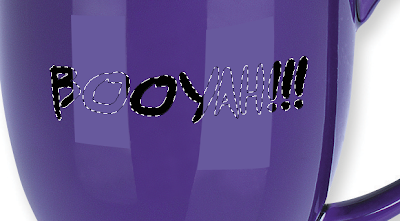
With the layer with the color for the highlight selected press Command+Shift+I, this will invert our selection. For the long way, go to Select> Inverse on the menu.
While selected press delete on the keyboard to delete the color around the imprint.
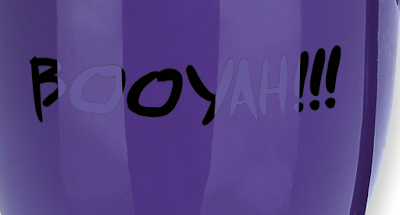
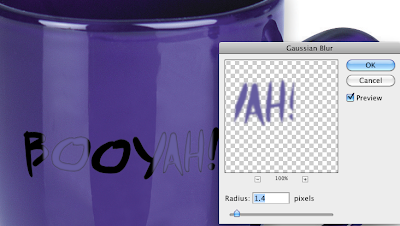
The highlight now looks pretty crisp. We need it to look more natural, meaning it has to blend in with the imprint. To do this we go to Filter> Blur> Gaussian blur on the menu.

A menu for the filter will pop up and now you can adjust the effect by moving the slider. It all depends on your taste. Play around with it then click ok when you are done.
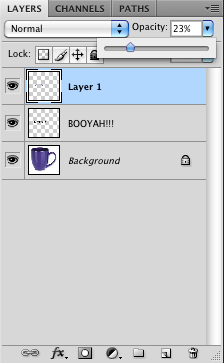
Were just about done...to make the highlight blend in more, I went in to the layers palette then adjusted the layer opacity of the highlight to blend it in more naturally.
After the highlight has been blended in the imprint looks 10 times better now. Here's our final image

Save and were done!

No comments:
Post a Comment