Difficulty: easy to medium.
(for windows users, substitute the Command key with the Control key, the Option key is the ALT key)
Open up the overexposed image
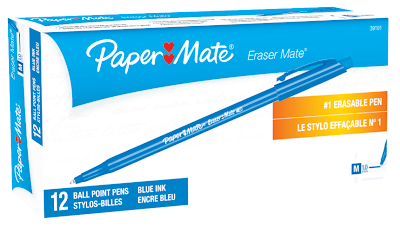
Since this image has overblown highlights, the white parts of it blends in with the white background. It looks like the labels are just floating in the air instead of imprinted on the box.
Next is to go into the Paths tab and check if the item has a path for the image. If it does not have one, you would have to create one for it by using the pen tool.
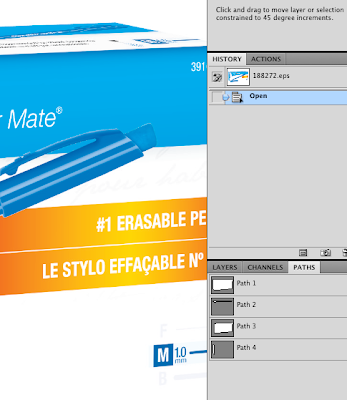
After locating/creating the path for it, hold the command key and hover your pointer above the corresponding path for the image and then left click on your mouse. You'd see the cursor change into a hand with a selection box. This means that when you click, the corresponding path will become the selection for your image.
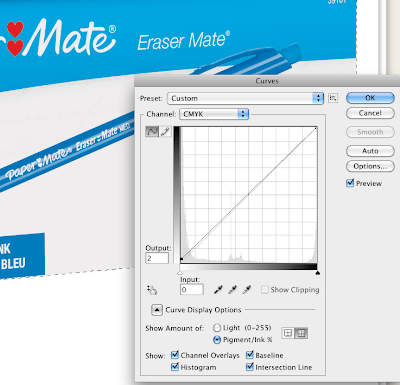
With the outline of the image selected...open up your curves adjustment window, or simply press command m on your keyboard. Since this image is in CMYK mode, go to the bottom left node of the curve adjustment and increase the value of it by 2...this will be displayed by the output window. If the image was in RGB mode, you would have to grab the upper right node instead of the lower left one. The part of the image that was selected will now display a slightly darker tone. Adjust your node to your desired taste. I usually start out by 2 then gradually adjusting it.
By doing this step, you are actually adding cyan, magenta, yellow, and black values to the selected parts of the image. Same with RGB, with this step you'll be adding values for red, green and blue. This actually adds color to your image.
Click ok to exit out of the curves adjustment window and apply your adjustment.
To add a bit of depth to the image, select a part of it that you would think would be darker to the rest of the image, in this case I selected the side of the box.
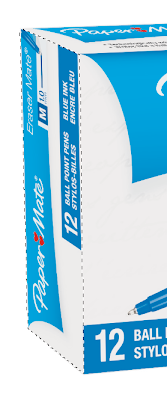
From lesson 2, we will apply the same thing.
On your keyboard press Command+Option+M. This will bring out your curves adjustment with the last inputted value still in it. Since we added 2% of the cmyk values the last time, doing it again will add another 2% to the selected area of the image.

By adding another 2% on the selected area, it will now be darker from the rest of the image. Click ok to apply the adjustment.
Again...if you want it darker, go more than 2%. It all depends on your taste.
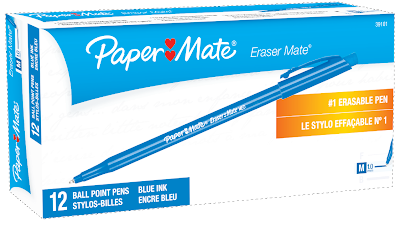
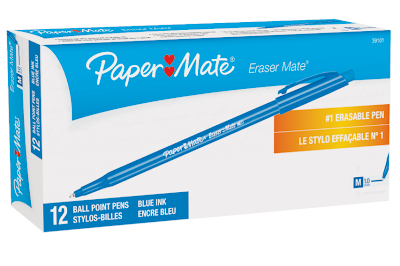
The final image now shows a better box that is not blending in with the white background, with a little bit of depth. Save your image then close.

No comments:
Post a Comment